
News Directory
How to Clean Ball Bearings
Hello and welcome to our guide on keeping your ball bearings in top condition!
1. Introduction
Ball bearings might seem like simple, small components, but they play a crucial role in countless devices you use every day. From your skateboard and bicycle to your RC car and even some home appliances, these tiny mechanical parts are what allow things to spin smoothly and efficiently.
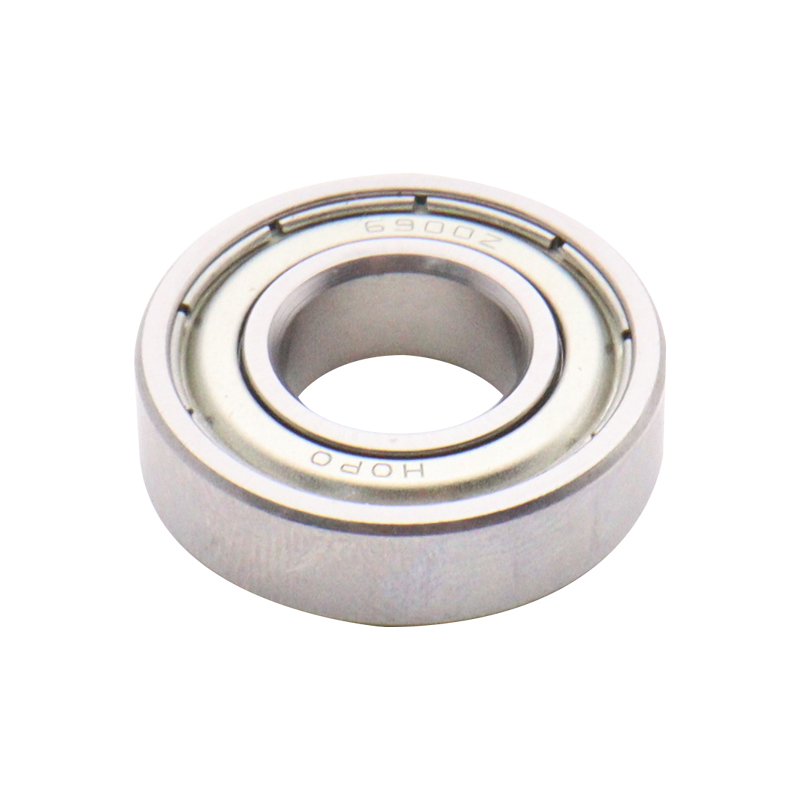
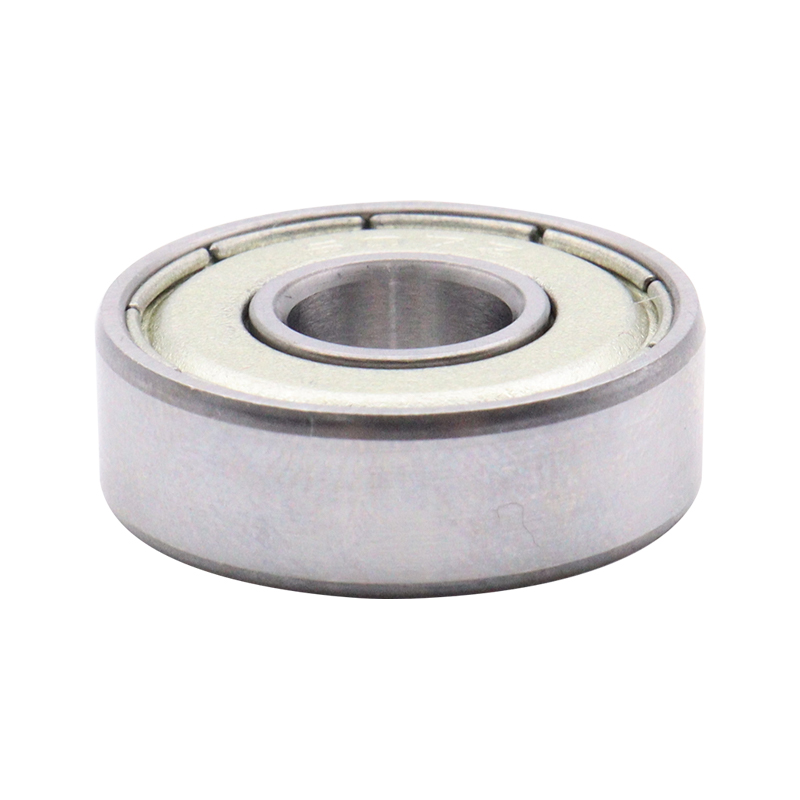
Essentially, a ball bearing is a type of rolling-element bearing that uses balls to maintain the separation between two bearing races. The job of a ball bearing is to reduce rotational friction and support radial and axial loads. In simpler terms, they make things spin faster, last longer, and work better by reducing resistance.
So, why is cleaning them so important? Over time, dirt, dust, and grime can get into the tiny spaces of your ball bearings. This contamination acts like sandpaper, creating friction that can slow down performance, increase wear, and eventually lead to complete failure. By regularly cleaning and maintaining your ball bearings, you not only improve their performance but also significantly extend their lifespan, saving you money on replacements and repairs.
2. Tools and Materials Needed
Before you start, it's a great idea to gather everything you'll need. This will make the whole process smoother and more efficient. Think of it like getting your ingredients ready before you start cooking!
Here's a list of the essential tools and materials:
- Solvent: This is your main cleaning agent. You can use something like mineral spirits, acetone, or a citrus-based cleaner. Each has its pros and cons, which we can look at more closely later, but they all do a great job of dissolving old grease and grime.
- Lubricant: Once the bearings are clean, they need a fresh coat of lubricant. The type you choose depends on the application. For high-speed applications like skateboards, you'll want a low-viscosity speed oil. For heavier loads or slower speeds, a synthetic lubricant or grease is a better choice.
- Bearing Removal Tool: For some applications, like skateboard wheels, you'll need a special tool to pop the bearings out safely without damaging them.
- Small Containers: You'll need a couple of small jars or bowls for the cleaning solvent and for rinsing. Glass jars with lids are perfect because you can seal them up.
- Soft Brush or Cotton Swabs: These are great for scrubbing away any stubborn dirt or gunk that's stuck on the bearings.
- Lint-Free Cloth or Paper Towels: You need something to wipe things down and dry the bearings without leaving any fibers behind. A microfiber cloth or shop paper towels work well.
- Gloves and Safety Glasses: Safety first! The solvents can be harsh on your skin and your eyes, so always wear protective gear.
| Material | Common Uses | Notes |
|---|---|---|
| Mineral Spirits | General purpose degreasing | Effective, evaporates slowly. |
| Acetone | Strong degreaser for tough grime | Evaporates quickly, can be harsh on some materials. |
| Citrus Cleaner | Eco-friendly option | Less harsh, pleasant smell. |
| Speed Oil | Skateboards, RC cars, high-RPM applications | Low viscosity, excellent for speed. |
| Synthetic Lubricant | Bicycles, general machinery | Balances speed and protection, good all-rounder. |
| Grease | Heavy-duty, low-speed applications | Provides excellent protection and longevity. |
Having these items ready to go will make the cleaning process a breeze. You'll be amazed at the difference a little maintenance can make!
3. Step-by-Step Cleaning Process
Disassembly (if applicable)
First things first, you need to get the bearings out of their housing. For most applications, this is pretty straightforward. For something like a skateboard wheel, you can use the axle itself to gently pry the bearing out. You can also use a dedicated bearing removal tool, which is a great investment if you plan on doing this regularly. The key here is to be gentle. You don't want to bend or damage the bearing's shield or the housing itself.
Cleaning
Now for the main event!
The Solvent Method
This is the most common and effective way to clean your bearings.
- Submerge: Take your small container and pour in enough of your chosen solvent (like mineral spirits or a citrus cleaner) to fully submerge the bearings.
- Agitate: Give the container a good shake or swirl. This helps to loosen and wash away the old dirt and grime. You'll likely see the solvent get cloudy pretty quickly, which means it's working!
- Scrub: For any stubborn gunk, use a soft brush or a cotton swab to gently scrub the bearing. Pay close attention to the crevices and around the shield.
The Ultrasonic Cleaner Method
If you have an ultrasonic cleaner, this is a fantastic tool for a deeper clean.
- Prepare: Place your bearings in the cleaner's basket.
- Fill: Fill the tank with a cleaning solution specifically made for ultrasonic cleaners, or even just some of your solvent.
- Run: Turn the machine on. The ultrasonic waves create tiny bubbles that implode, creating a powerful scrubbing action that gets into all the nooks and crannies. Typically, a few minutes is all you need.
Rinsing
Once the bearings look clean, you need to rinse them thoroughly. You can do this by using a fresh batch of clean solvent or by using isopropyl alcohol. The goal is to wash away any remaining dirt particles and the old solvent. Swish the bearings around in the clean liquid until you're sure they're spotless.
Drying
This is a critical step! You must make sure your bearings are completely dry before you apply new lubricant. Any moisture left inside can lead to rust and ruin the bearing.
- Air Drying: The simplest method is just to let them air dry on a lint-free cloth. This works well, but it can take some time.
- Compressed Air: If you have access to an air compressor, you can use it to carefully blow the moisture out. Just be sure to use short, gentle bursts. Too much pressure can spin the bearing too fast and damage the races!
Inspection
Once your bearings are clean and dry, take a moment to inspect them. Hold each one and give it a spin. Does it feel smooth? Look for any signs of cracks, pitting, or rust. If a bearing looks or feels damaged, it's better to replace it now rather than risk a failure later.
| Step | Purpose | Key Takeaway |
|---|---|---|
| Disassembly | Safely remove bearings from their housing | Be gentle to avoid damage. |
| Cleaning | Remove all old lubricant and debris | Use a good solvent and agitate well. |
| Rinsing | Wash away residual dirt and solvent | Ensure a clean, residue-free surface. |
| Drying | Eliminate all moisture | Crucial step to prevent rust. |
| Inspection | Check for wear or damage | Replace any bearings that show signs of failure. |
Next up, we'll talk about lubrication—the final piece of the puzzle to get your bearings spinning perfectly.
4. Lubrication
Why is lubrication so crucial after cleaning? When you cleaned the bearings, you stripped away all the old lubricant, which is essential for reducing friction and protecting the metal components. Putting a new, clean lubricant back in is what makes them perform their best and prevents them from wearing out quickly.
Think of it like oil in your car's engine; it keeps all the moving parts from grinding against each other.
Types of Lubricants
Choosing the right lubricant is key. The type you need depends on what you're using the bearings for.
- Oil-based Lubricants: These are thin, low-viscosity oils. They're perfect for high-speed applications where you want maximum speed and minimal drag, like in skateboards, inline skates, or RC cars. A few drops are all you need.
- Grease-based Lubricants: Grease is a much thicker substance. It's designed for heavy-load, low-speed applications where the bearings need long-term protection from moisture and contaminants. This is a common choice for things like bicycle hubs and industrial machinery.
| Lubricant Type | Best For… | Pros | Cons |
|---|---|---|---|
| Speed Oil | High-speed, low-load | Maximum speed, low friction | Needs more frequent re-application |
| Grease | Heavy-duty, low-speed | Excellent protection from elements, long-lasting | Can slow down rotation speed |
How to Apply Lubricant
The goal is to apply just enough lubricant, not too much. A common mistake is to over-lubricate, which can actually attract more dirt and slow the bearing down.
- For oil-based lubricants: Put one or two small drops directly onto the balls inside the bearing. Give the bearing a gentle spin by hand to help the oil work its way around all the components.
- For grease-based lubricants: A small dab is all you need. Use a tool or your finger to apply a small amount to the inside of the bearing, ensuring it gets onto the balls. Then, spin the bearing to distribute it evenly.
Once you've applied the lubricant, your bearings are ready to be reinstalled! Let's cover that in the next section.
5. Reassembly
This part is pretty simple, but it's important to do it correctly to ensure your bearings work as they should.
When you're ready to put the bearings back into their housing (whether it's a wheel, a motor, or anything else), the key is to ensure they are seated properly. They should go in straight and fit snugly.
- For most applications, you can simply press the bearing back in with your thumb. You'll feel it "pop" or slide into place.
- For a tighter fit, you might need to use a tool to gently tap it into place. A rubber mallet is ideal for this. Just make sure you are applying force evenly on the outer race of the bearing, not the inner race or the shield.
| Method | Ideal For | Notes |
|---|---|---|
| Thumb Press | Looser fits, general use | Easiest and safest method. |
| Gentle Tapping | Tighter fits | Use a rubber mallet and apply force to the outer ring. |
| Bearing Press Tool | Precision applications | Provides even pressure, preventing damage. |
Once the bearing is seated, give the wheel or component a quick spin. It should feel smooth and quiet. If it's a little stiff at first, don't worry—the lubricant just needs a moment to work its way fully into the bearing.
With your bearings cleaned, lubricated, and reassembled, you're ready to go!
6. Maintenance Tips
Think of your bearings like a car engine; a quick tune-up every now and then prevents major problems down the road.
Regular Cleaning Intervals
How often you need to clean your bearings really depends on how you use them.
- High-Contamination Use: If you use your skateboard on dusty roads, your RC car on sandy tracks, or your bike in muddy conditions, you'll want to clean the bearings more often—maybe every few weeks or after a particularly dirty session.
- Low-Contamination Use: If your bearings are in a sealed environment or used indoors (like on a stationary machine), you can get away with cleaning them less often, perhaps every few months.
The best rule of thumb? Clean them when you notice a drop in performance. If they start to feel sluggish or sound noisy, it's time for a cleaning.
Proper Storage
When you're not using your equipment, how you store it can make a big difference. Keep your gear in a clean, dry place. Storing it in a damp garage can lead to rust, and leaving it out in the open can attract dust and dirt, contaminating the bearings even when they're not in use.
Signs of Bearing Wear
Even with regular cleaning, bearings don't last forever. They are a wear-and-tear component. Here are some signs that it might be time to replace them:
- Grinding or Scratchy Feel: If a clean bearing still feels rough when you spin it, that's a sign of internal damage like pitting on the races or balls. No amount of cleaning or lubrication can fix this.
- Excessive Noise: A smooth-running bearing is quiet. If it's making a loud grinding, screeching, or rumbling noise, it's a clear sign of significant wear or a lack of lubrication.
- Visual Damage: Look for any visible cracks, dents, or rust on the bearing itself. If you see any of these, it's time for a new one.
| Sign of Wear | What it Means | Recommended Action |
|---|---|---|
| Rough Spin | Internal damage or contamination | Inspect; replace if still rough after cleaning. |
| Loud Noise | Lack of lubrication or wear | Lubricate; if noise persists, replace. |
| Visible Rust | Moisture damage | Replace immediately. |
By keeping an eye on these things and performing regular maintenance, you'll get the most out of your bearings and keep your equipment running smoothly for a very long time!
7. Troubleshooting
It's frustrating when your bearings don't perform as expected. Let's look at some common problems and what they usually mean.
Noisy Bearings
If your bearings start making a grinding, humming, or screeching sound, it's a sure sign of an issue.
- Grinding Noise: This is the most common sound and usually means there's dirt or debris inside the bearing. The particles are grinding against the balls and races. The solution? A thorough cleaning and re-lubrication. If the noise persists after cleaning, the bearing is likely damaged and needs to be replaced.
- Humming or Screeching: This can be a sign of insufficient or incorrect lubrication. It might also indicate that the bearing is overheating. Make sure you've used the right type and amount of lubricant for your application.
Slow Rotation
If your bearings feel sluggish or don't spin freely, a few things could be happening.
- Over-Lubrication: A very common mistake is adding too much lubricant, especially thick grease. Excess lubricant creates drag, which slows down the bearing. The fix is to clean the bearing and apply a smaller amount of the correct lubricant.
- Contamination: As we've discussed, dirt and grime act as brakes. If the bearing is slow, a good cleaning is the first step.
- Incorrect Installation: If the bearing isn't seated properly, it can be under too much pressure, causing drag. Make sure the bearing is pressed in straight and fully seated.
Bearing Failure
In the worst-case scenario, a bearing can fail completely. This might be sudden, with a loud bang, or it might be a gradual seizing up.
- Common Causes of Failure:
- Contamination: This is the number one cause of bearing failure. Dirt, dust, and moisture get in and damage the components.
- Lack of Lubrication: Without a proper lubricant, the metal parts will rub directly against each other, creating heat and friction that eventually destroys the bearing.
- Incorrect Installation or Handling: Forcing a bearing into a tight spot or dropping it can cause dents or cracks, leading to premature failure.
| Problem | Likely Cause | Solution |
|---|---|---|
| Noisy | Contamination or lack of lube | Clean and lubricate; if noise persists, replace. |
| Slow | Over-lubrication or contamination | Clean and re-lubricate correctly. |
| Complete Failure | Severe contamination or lack of lube | Immediate replacement is necessary. |
By understanding these common issues, you can quickly diagnose problems and get your bearings—and your equipment—back to peak performance.
Conclusion
You've made it to the end of our guide! We hope this step-by-step walkthrough has shown you just how straightforward it is to care for your ball bearings.
Throughout this guide, we've emphasized a few key points:
- Cleaning is Crucial: Regular cleaning removes the dirt and grime that can act like sandpaper, damaging your bearings and slowing them down.
- Lubrication is Essential: Applying the right type and amount of lubricant after cleaning ensures your bearings spin smoothly and are protected from friction and wear.
- Maintenance is Key: By regularly inspecting and caring for your bearings, you can catch minor issues before they become major problems, saving you time and money.
Remember, your ball bearings are an integral part of your equipment's performance. By giving them a little attention, you can keep them running at their best, ensuring optimal speed, efficiency, and a longer lifespan for your gear.
Taking the time to clean and maintain your bearings is a small effort with a huge payoff. If you have any questions or need to find the perfect replacement bearings, please don't hesitate to reach out! We're always here to help you keep things running smoothly.


 English
 中文简体
中文简体 عربى
عربى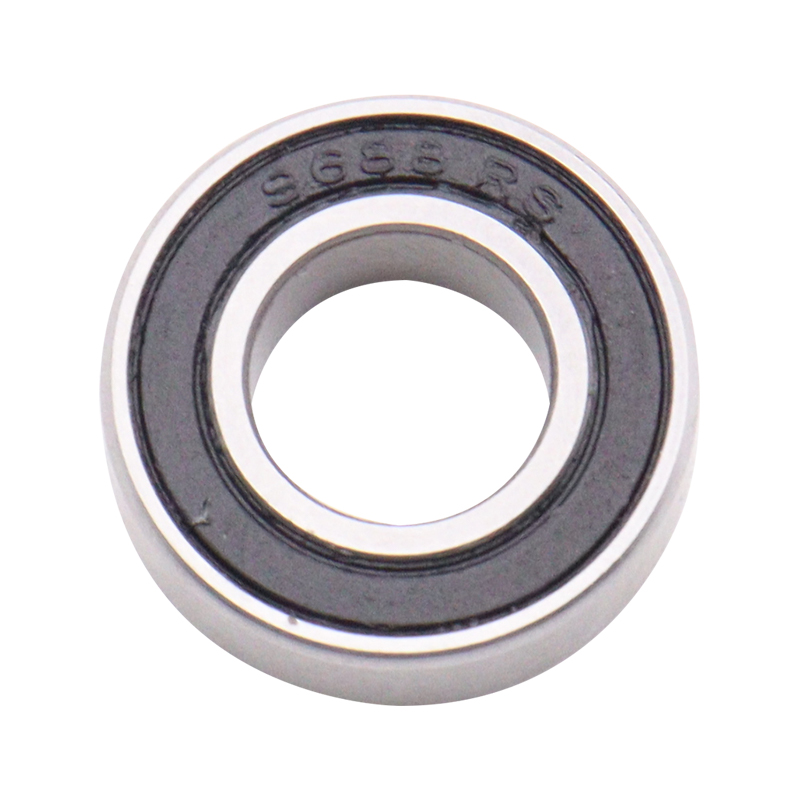

 Download Catalog
